Rendering has taken its hold on the project at the moment but renders are coming along nicely. However has left my hardly any time to blog!
A little update with the project though is we have finished all modeling expect for one last model which is off the toy ship that the camera pans around to. We have had alot of discussions on how far we should go with this. Time agian is causing problems but we have decided to keep it simple. We had the idea of doing the samething as I did for the statue and sword (sword blog is still to come). But we wanted to make it simple, just have a piece of wood that has been well carved into the shape of the boat with some stylized sails. The main reason is that it has to blend into the real model of the ship as we have a shot that comps together.
Rendering is nearly completed now and only have small renders to do so plently of time to composit things together and start to set the mood for the shots.
Wednesday, 29 December 2010
Sunday, 19 December 2010
Statue Development


Here are more images showing how I have tried to perfect the style of the statue. While using the flatten tool and pinch. I finally started to get the right shapes. I had to change the shape of the eyebrows to as they were quite boring at first.

My idea was to make 2 mesh's One high poly model that would be the main on at the beginning when we see it as a whole. then make a lower poly model that would only be using when we start to crumble it as that will take up alot of rendering time which wont be needed.

Here is the retypologised mesh I created in topogun (no images to due it crashes if you try).


This is the model, on a very low quality render. I am happy with the outcome. Didn't have alot of time to go further with it, if I did I would of taken more time into the retypolosing phase. As then I wouldn't have to put all my hope into making a good displacement map. I could use the displacements for other things like cracks and indentations.

Here is the low poly mesh that I created ready for Sanjay to shatter and crumble!
Emperor Statue

For the admirals room I had to create and model a statue of the emporer. It starts as a symbol of power and glory, though it ends with destruction. So thats the quick summary of what this statue needs to show. The hard truth was we needed the statue to literally crumble. So firstly I started to gather images of the Emperor at the time. First image (top) was perfect for the style and texture. I didn't want to go crazy as I didn't want to make it to hard as time isn't on my side and I have many models to finish aswel.


I lover the idea of the Emperor being sat on his throne. But the concept of the standing statue crumbling was strong to the story.


First image showing the development of the statue. I started from a cube in maya and took that straight into zbrush. Not my usual method but I didn't want to create a base mesh in maya and get stuck with that shape. So I got into zbrush straight away to get the look I really want.


Here is the eyes after that. I started to get the shape I wanted. Also I started looking at out to stylized the statue. I don't want it to look like its real. So I developed my own brush in Zbrush, it was based on the pinch tool but I made sure it gave me the a better angle when creating the harder edges as you can see around the eyes and nose.
Thursday, 9 December 2010
Compositing Test


This image is a very abstract way of showing ruff times ahead. I would love to try a bring this to life but I feel it would be hard to portray, so the image I spoke about before would most likely be easier that this.


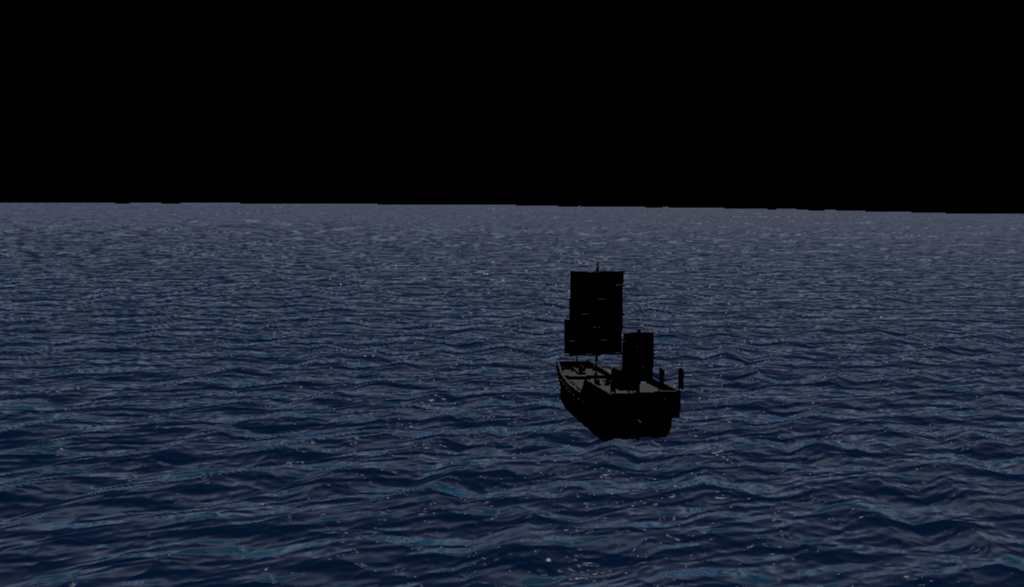


Here is an enlarged image. I feel its gone well but still has the greyscale ship. Also misses reflections, specular s and shadows.


Admirals Room Development


Below are images showing the start of developing the look for the Admirals Room. Its one of the most important environments, it has about 12 shots altogether within this room. I have taken control of this environment. I will over see the the layout of the scene and make sure its organised and ready for the animations and finally renders! I have given the other 3 environments to 3 others in the group so not just one person is doing all the organising, but we all will be working on each shot as a group to make sure everything fits together!
These first two images show some more reference images I liked for adding a stand for the statue as before is was just a cube and this idea I had for the flags and drapes that I wanted in the room!
Some problems that have been occurring whilst working in a big group are importing and exporting models, this causes loads of different textures and loads of different lambert's, blinn which can increase rendering time and just causes confusion!


Some problems I have been having is the table and the fact I want it to be filled with stuff. I want it to look like a table thats in use and is a place where someone works and spends all his time.
So I have been finding objects to show this. I plan to have loads of scrolls, maps and papers covering the table to show that this table represents the ship and its goals, travels and misfortunes.
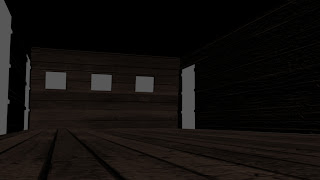


 The final 4 images show the textured walls of the admirals room. I didn't go crazy with textures as you can see at the bottom with the image with all the objects you don't really see it or focus.
However I had some troubles with the wall with repeatative textures (first on the right) I had to take it back into photoshop and paint in some of my own wood to try get rid of this, also used the clone tool if I felt that was best to achieve this, but most of the time its the tool that causes those problems.


However I had some troubles with the wall with repeatative textures (first on the right) I had to take it back into photoshop and paint in some of my own wood to try get rid of this, also used the clone tool if I felt that was best to achieve this, but most of the time its the tool that causes those problems.

Subscribe to:
Posts (Atom)